

In previous tutorials, we went through CRUD with LPKTutorialOne, and Function IDs / QueryFilters / Composites with LPKTutorialTwo. In the third tutorial, I want to go over common components that LPK offers, that will expedite the process of building your iOS application.
Note: The components covered in this tutorial offered by LPK are only supported for the iPad device.
To start, you can obtain the tutorial code here. We will be going over LPKTutorialThree, and we will once again be utilizing the MovieCollectioncommunity we created in dev. When launching the application for the first time, you will see this screen.

LPK offers a set of UI components to get developers through the process of setting up the login flow, so they can focus on the application. The LPK Login UI supplied takes care of everything that you need, including:
- App delegate hooks to supply your own background and app logo
- 1Password integration
- Community Selection (applicable only if you belong to several communities)
- Login As (must be configured via the Role item)
- Registration

Registration Screen Supplied by LPK. Images are configurable
After everything is done, the app delegate has a callback method for returning the view controller of your choice. For this tutorial, I’ve implemented it with MainViewController.

The MainViewController contains a series a demo, and in this tutorial (Part 1), we will go through half of them, and I will explain how to integrate them into your own application.
Enumeration / Item Selectors
Recall from MovieCollection, we have an existing enumeration called MovieCategory. In the previous tutorial we had a series of (unaesthetic) blue buttons to allow the user to switch category. As part of LPK, there is a piece of UI that will give you a list of enumerations, given the name.

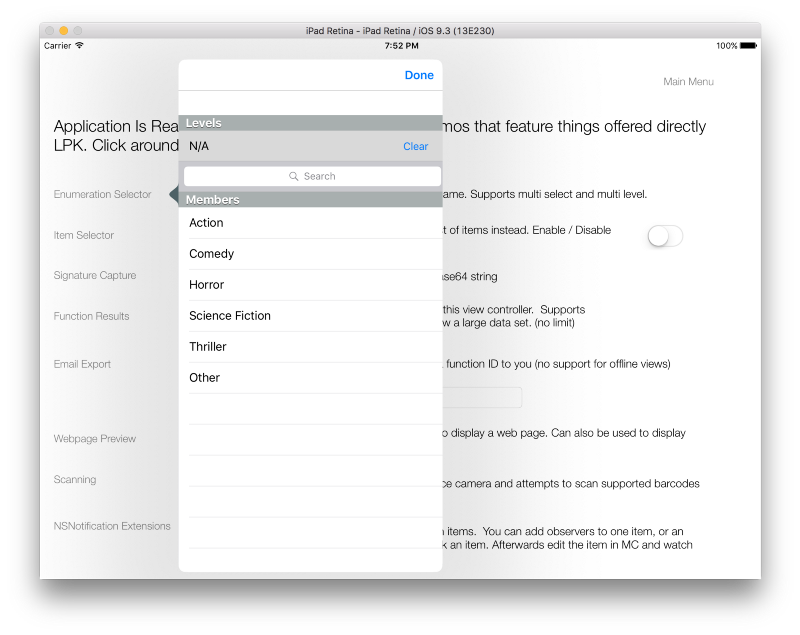
This class presents a pop up selector based on a rect, so it can be placed anywhere on screen. (There is also a helper method to take in a barButtonItem). After selecting your enumeration, it is returned to you in a completion block.
The same UI is offered for items.

In the tutorial code, you’ll notice that I wrap the above in a navigation view controller, but I”m only doing that because I want to present it as a pop over. You can use the ItemSelectViewController any way you see fit. Also noticed that there is a switch to the right of this demo. Enabling the switch allows the item selector to allow multi select. In the demo I implement the block for both a singular item and multiple items to show you how it works.

Now there actually one more piece to this puzzle. You may be wondering, how does the application know what to put in the table cell, I haven’t even defined it! Well in LPK, we are definitely a fan of doing as much of the UI work for you (where applicable). The ItemSelectViewController works in conjunction with a Definition Item. If you go to MC and go to item blotter = Definition, you will find the following relevant item.

Certain classes in LPK know to find the Definition item of a particular type. In this case: defType = cellDef, type = Movie (the item Type). You’ll see for tables there are three things of interest, which is row1, row2, row3.
To start off, I kept it simple, putting 1 variable in each row. Row 1 for name, row 2 for description. But you can actually put in much complex things. This is covered in Part 2 of this tutorial. (Or if you’re eager, you can look at the definition item for the MovieRatingComposite)
NSNotificationCenter
Moving all the way to the bottom of the list, we’re going to cover how to receive updates by using observers. To begin, import the necessary header, and create a property for your observer.

This observer in general will be used to give the developer updates whenever the item (or a particular item type) has been updated. This is perfect for popping the review controller for a detail form when the item has been deleted. This demo utilizes the Item Selector which was described above. After receiving the LDMItem, we now attach an observer to it so we can receive updates.

The actual observer setup method is simple. Since it’s an extension of the existing iOS Notification Centre platform, the syntax is very similar.

The important thing to note here is that if aItem does exist, we call copyHeaderAndDataFromItem, which is the safest way to main your current item variable. If aItem is nil, it means the item has been deleted, and you can update the UI accordingly.
There are also methods for adding an observer many items, as well as an item type, as shown below.

NSNotifications are also covered in the Liquid GitBook, found here.
That’s all I wanted to cover for this tutorial. In Part 2, we’ll go over the other UI components.